Wednesday, July 23, 2014

Fried Squash, Zucchini, Mushrooms....

IMGP1355Do you have an over abundance of squash or zucchini from your garden?  Let's be honest, you can't always choose healthy recipes for them.  If you can, I need to know your secret of self control.  I mean, every once in awhile you just have to bust out the grease and fry something.
What You Need:
*Crisco (I like butter flavored)
*Eggs
*Crackers (Ritz or Saltines)
*Salt to taste
*Squash, Zucchini or Mushrooms
*Optional: sprinkle grated parmesan cheese on top
IMGP1343
1.  Slice squash or other item you are frying.  You want a nice med-thin uniform cut.  (No need to remove skin)
breading
2.  Melt Crisco on med. heat.  You want enough to cover the bottom of the pan (approx. 1/3 cup). Smash crackers in a ZipLock bag.  This is a fun way for the kids to help.  My mom used to give us the rolling pin and let us go to town on the bag.  The finer the crumbs, the better they will stick.  Just be careful not to puncture a hole in bag or you'll have crumbs everywhere!  Whisk eggs together (start with 2-3, depending on how much you will be frying.  You can always add more later.)
IMGP1349
3.  Turn heat up to med.-high.  Dip squash in egg and then coat in cracker crumbs.  Now you're ready to fry!
IMGP1351
4.  Watch closely and flip as soon as you get a nice golden brown crust.  Remove and place on paper towel to drain grease.
IMGP1353
5.  Sprinkle with salt, parmesan cheese if you want and serve as is or with a dipping sauce.  These are best served warm.
This is a very basic breading recipe that can be used with practically anything that you want to fry.  I grew up eating morel mushrooms this way.  We'd go mushroom hunting every spring.  These are a family favorite, so when it is not mushroom season, we substitute them with zucchini or squash which have a similar texture.

Refreshing Limeade & Cherry Limeade


So there is this awesome place down the road from me called the Bargain Factory.  I love this place.  They have a little bit of everything and at majorly discounted prices.  Some of the items are damaged, some are expired and some are perfectly fine.  Last week I found limes that were 10 for $1 and I couldn’t pass them up.  It is extremely hot outside so I decided what better use for them than to make some cold refreshing cherry limeade.
What You Need:
6-8 Limes or (approx. 1 cup lime juice)
1 cup sugar
1 jar of maraschino cherries
2 liter bottle of lemon lime soda of choice
Optional: Cherries and lime slices for garnish
IMGP1383
1. Chill ingredients in freezer (my soda got a nice little slush, just don’t forget it!) or fridge.  If using fresh limes (which I recommend), roll limes around on a hard flat surface to release juices.  Cut limes in half and squeeze juice into a bowl or glass measuring pitcher until you have approximately 1 cup.  You can strain the pulp or leave it, just make sure there are no seeds.  I like a little pulp texture in my limeades, but then you’ll want to make sure you serve with a straw.
IMGP1385
2.  Get a large pitcher and combine soda, sugar, lime juice and jar of cherries with juice (reserve 1/2 jar of cherries for garnish, but use most of juice).  If making original limeade, combine everything except cherries and cherry juice.
IMGP1386
3.  Stir everything together well, then chill in refrigerator for 15-30 minutes or serve immediately over ice.  Do not add ice to pitcher because you don’t want the mix to get watered down.
4.  Optional: Serving in an awesome boot mug and garnishing with lime slices and/or cherries.

Friday, July 11, 2014

Garden Fresh Garlic Butter Green Beans


These are super simple and delicious green beans.  You can use green beans straight from your garden, the farmer's market or fresh beans from the grocery store.  This recipe only serves 2-3, so double, triple or quadruple recipe if you need to!

What you need:
-1/2 cup boiling water
-1 lb. fresh green beans
-2 T. salted butter 
-1 T. minced garlic
-Garlic salt or reg. salt to taste

1.  Rinse, trim ends & cut fresh green beans in half.
2.  Add to saucepan with 1 cup bowling water.  Let boil for approximatley 6-7 min. until beans are tender, but still have some crisp.

3.  Drain water.  Add beans back to stovetop (heat reduced) with butter, minced garlic and garlic salt.

4.  Toss until butter is melted and beans are coated with butter & garlic.

5.  Serve and enjoy!

Monday, July 7, 2014

good2grow - Where Healthy Meets Stealthy

I am always looking for new ways to sneak veggies into my kids.  That being said, juices seem to be the only way I can successfully get by with it.  I have tried several different kinds of fruit and vegetable juices and it has usually ended with frustration because the containers are not easy for the kids to use, they squirt out all over the place or they are filled with artificial flavors, colors, preservatives & high fructose corn syrup.  It wasn't until we tried good2grow that I could really just relax and know that my kids were getting good stuff and that they weren't going to be a sticky mess when they were through.  
As soon as our kit arrived in the mail, my 3 year old daughter was going crazy over the Sophia the 1st SippaTop cap.  The reusable character tops add a fun amount play to a practical drink.  Plus, did I mention that they are spill proof?  I could give the Thomas one to my 1 year old and not worry about juice being all over the floor or furniture.  The top does not have to be pushed in or pulled out, it is always ready and always spill proof.
Here is why good2grow is our juice of choice:
     *No high fructose corn syrup, no added sugar, artificial colors, flavors or preservatives
     *They are Non-GMO and are available in organic
     *They are BPA free so you can reuse them and refill them and are recyclable when through
     *They are available in 100% fruit juice flavors or fruit & veggie blends

Enter to win a $5000 scholarship or free coupons!!
good2grow wants to invite you to play with your drinks and your kids by creating and sharing a video storybook starring them and their favorite good2grow characters.  Post your videos to Vine using #storystitcher then visit good2grow.com/storystitcher.  Choose your favorite scenes and stitch them together to create a magical story.  Have fun & good luck!

Enter to win a themed birthday party AND get a free refill pack coupon
The winner will be notified by email on August 16, 2014.
Good luck!

Did you get your free coupon?  Which characters are your family favorites? 
  1. **I received this product for free from the sponsor of the Moms MeetSM program, May Media Group LLC, who received it directly from the manufacturer. As a Moms MeetsSM blogger, I agreed to use this product and post my opinon on my blog. My opinions do not necessarily reflect the opinions of May Media Group LLC or the manufacturer of the product. 

Tuesday, July 1, 2014

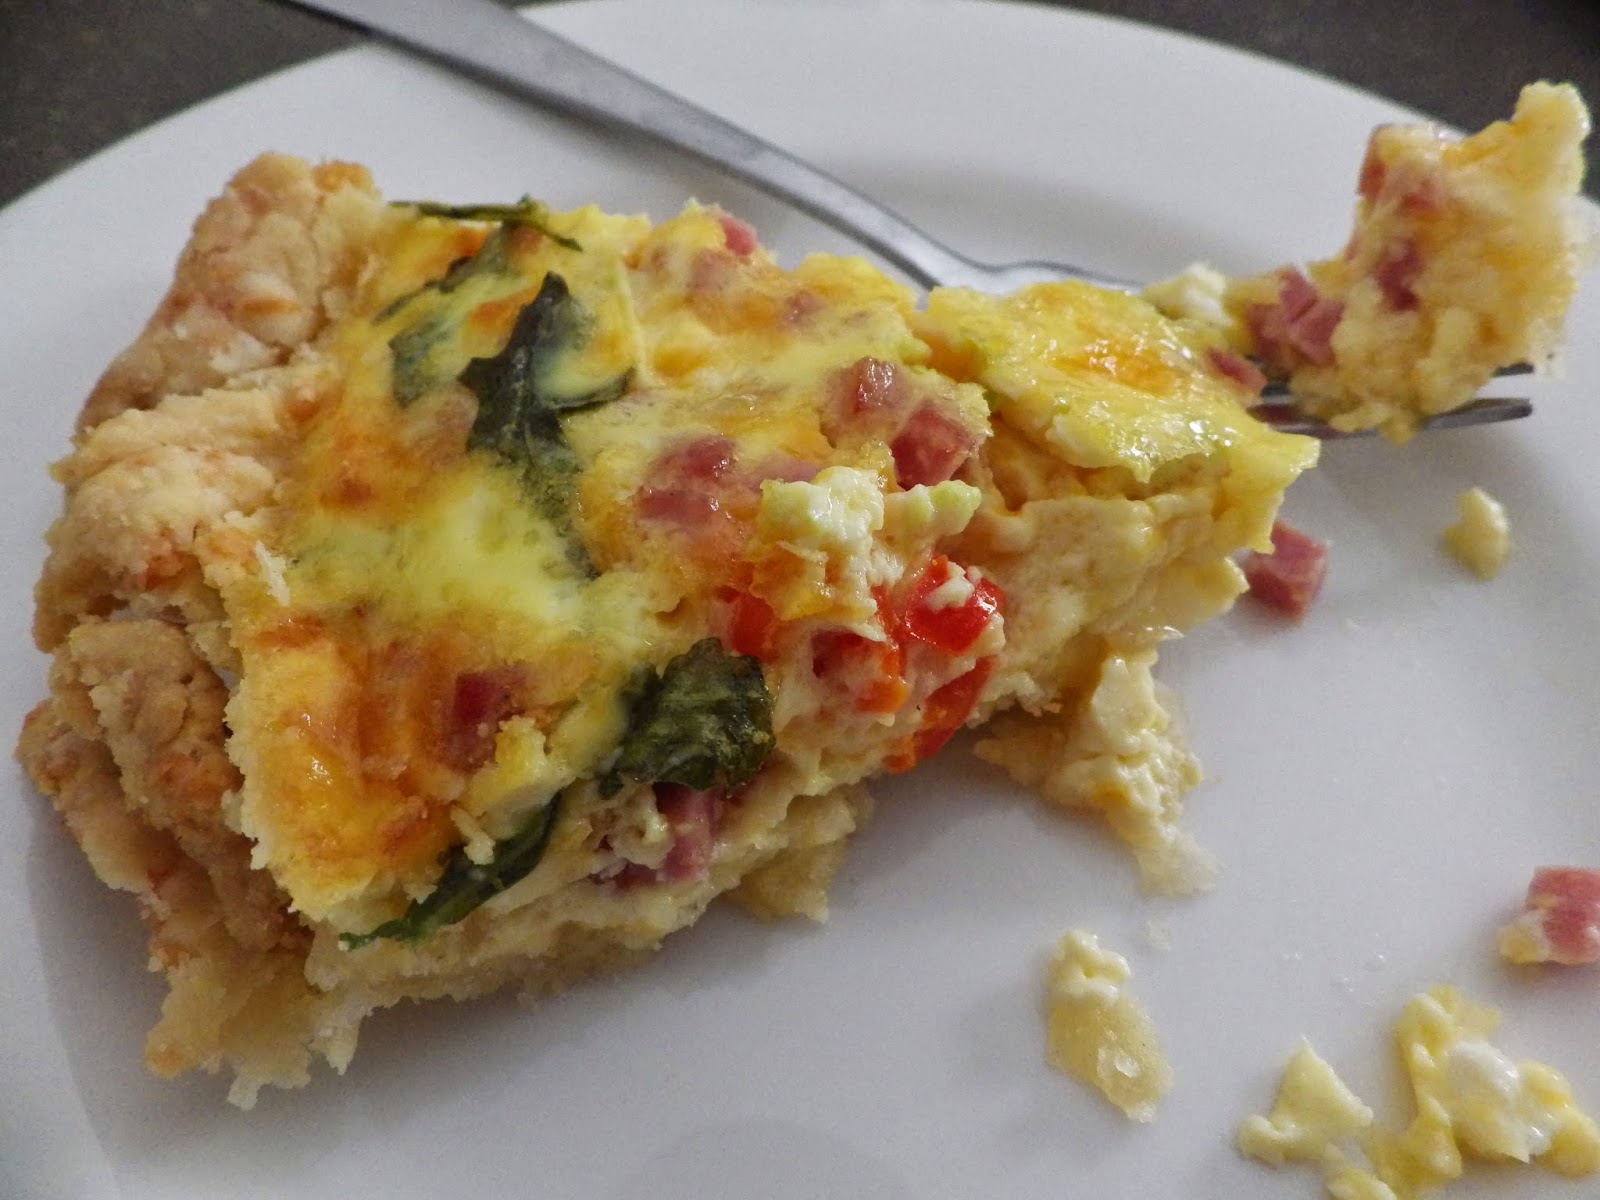
Easy Cheesy Buttery Quiche Crust & Filling

 What you need for crust:
3/4 cup all-purpose flour
6 T. cold butter cut into small pieces
1/4 cup shredded cheddar cheese (or favorite)
5 t. ice cold water (maybe a little more)

1. Put flour & butter into a mixing bowl.  Rub/cut in butter to flour until mixture looks crumbly.
2. Add shredded cheese and mix together.
3. Sprinkle cold water over mixture, one teaspoon at a time, stirring gently after each addition.  Add just enough water that dough cleanly leaves the side of bowl and forms a ball.  Refrigerate for at least 30 min. or until ready for use.
4. Preheat oven to 375 F.  Lightly flour surface & rolling pin.  My dough was a little crumbly and I had to add a tiny bit more cold water at this point to keep my ball from falling apart.  Do not add too much and do not over work the dough.
5. Gently roll out dough.  It will most likely not form a perfect circle and that's okay. Fill in the gaps with any dough that overlaps.  Do not push dough into pan or it will stick to edges more.
6. Take a fork and prick some holes in the bottom of the crust.  This helps release moisture and lets the dough cook more evenly.
7. Place in fridge until ready to fill & cook.

What you need for filling:
4 eggs
3/4 cup whole milk
1 cup cubed cooked ham
1 cup shredded cheese
Salt & Pepper
Desired veggies (sautéed onions, sweet peppers, arugula, whatever you want)

1. Whisk eggs, milk, salt & pepper together in bowl.
2. Add ham, cheese and sautéed or fresh veggies.  (Do not add spinach or arugula yet.)
3. Pour mixture into crust and with whisk, distribute ham & veggies evenly.
4. If you are adding spinach or arugula, do that now, placing on top and gently pushing down until egg mixture partially covers.
5. Bake for 40 minutes or until crust is golden brown and filling is cooked through.
Serve and Enjoy! Crust is buttery and flaky with small crunchy bits of cheese that give it great flavor.  

Thursday, June 26, 2014

15 min. Perfectly Thin & Crispy Pizza Crust

I love pizza and I have been on the hunt for an easy & yummy crust recipe.  This is it!  It comes together so fast and the dough does not need to rise, so you can literally make homemade pizza in approximately 30 min.  The crust is crispy, chewy and flavorful.  I loved sharing it with my friends and being able to say that I made my crust from scratch.  Plus, as often as we eat pizza, this is a quick, delicious and cheap alternative.  

What You Need:
3/4 cup warm-hot water
1 pkg (1/4 oz.) active dry yeast
1/4 teaspoon sugar
1 3/4 cup all purpose flour
1/2 teaspoon garlic salt (or reg. salt)
1 1/2 teaspoon italian seasoning

1. Preheat oven to 500° F with pizza stone or pizza pan inside 
2. Heat water in microwave on high for 15 seconds (water should be like very warm bath water 105°-115°)
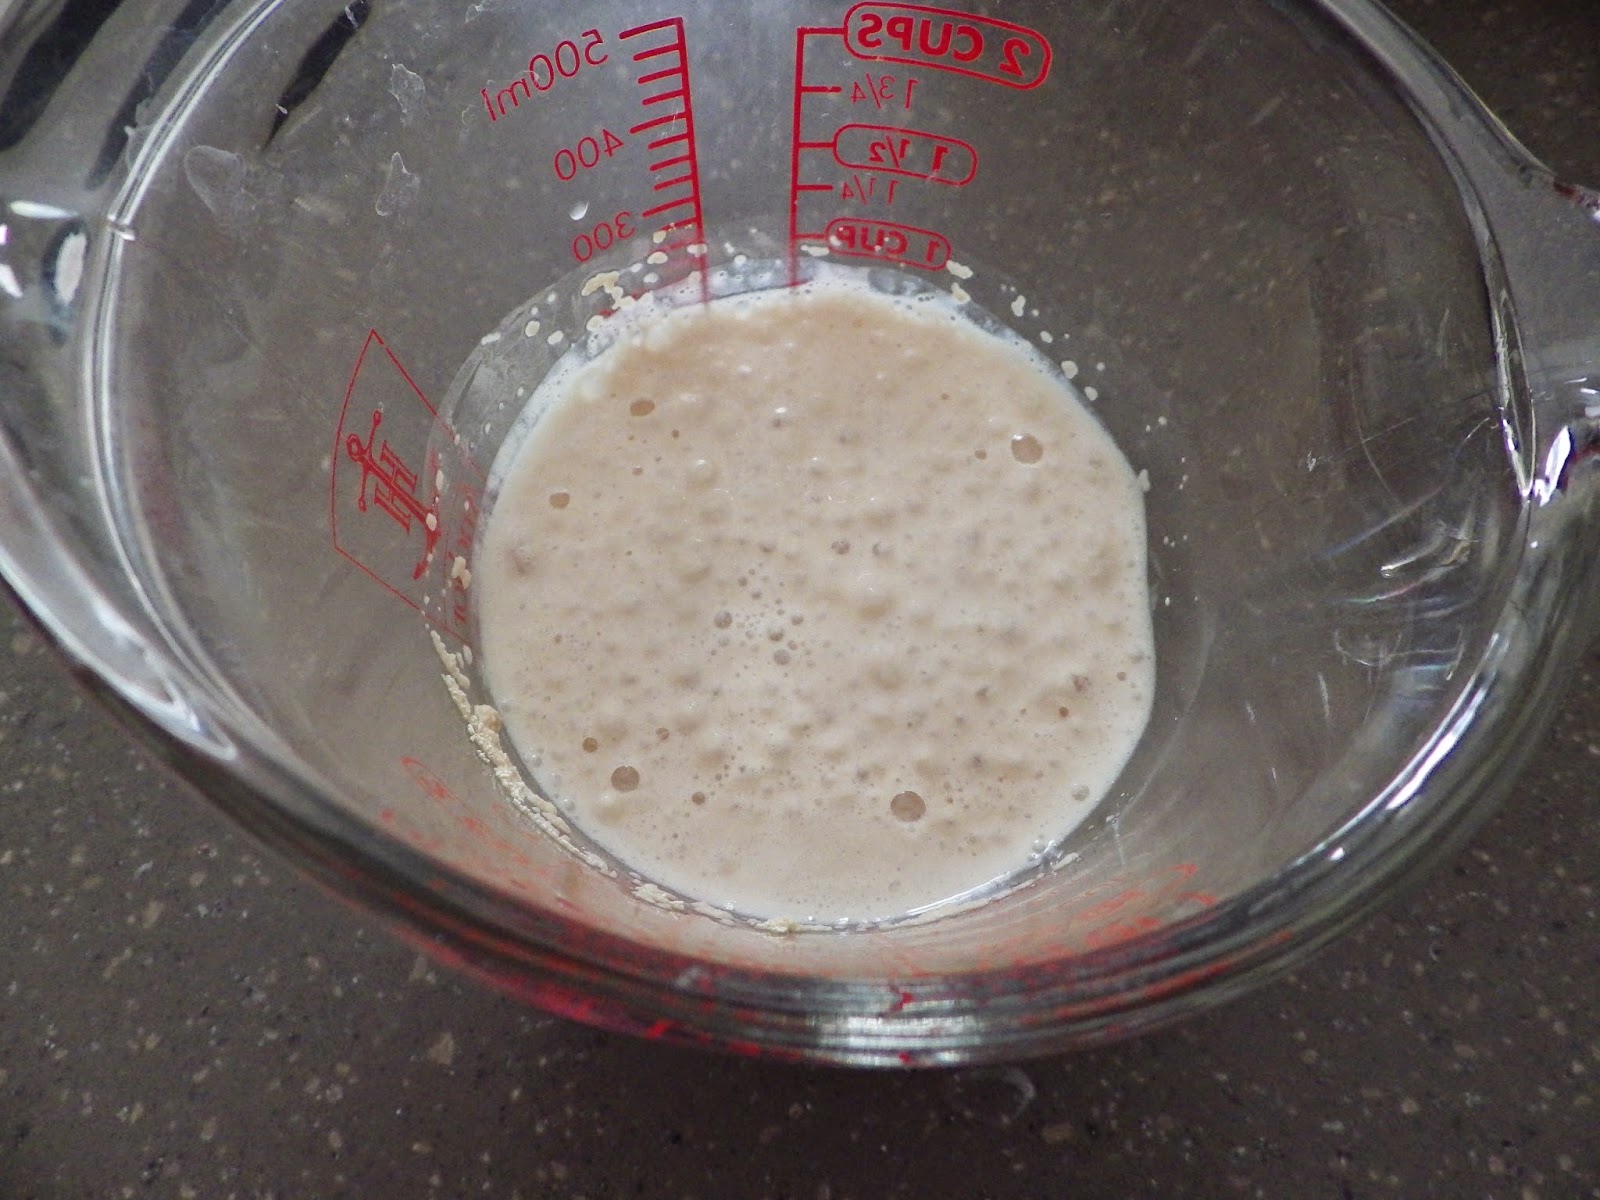
3. Dissolve sugar and yeast into water & let set for 7-10 min. until creamy & bubbly.  
4. Combine flour, salt & italian seasoning into a mixing bowl.
5. Pour yeast mixture into flour mixture and combine until you have a dough ball.
6. Put dough onto lightly floured surface (I love my pastry cloth) and knead for 2 minutes.
7. If needed, sprinkle a little more flour on surface, flour your rolling pin and roll dough into a circle, the thinner you roll it, the crispier your crust will be.  Tips: While rolling, continue to flip dough over, always add a little more flour if dough is sticking and roll firm, but not too hard or dough will stick.
8. Trim your dough to fit your pizza stone or pan.  Slide your arms under the dough and transfer to the hot stone or pan.  Be very careful not to burn yourself!  Pizza does not have to be round, make it square if you want or use the dough trimmings to make random shapes.
9. Bake empty crust in 500° F oven for 4-6 min.  If you want, you can brush very lightly with olive oil to give a little flavor and extra browning to the crust.  Wipe off any excess oil to keep from getting soggy.  If using right away, go to step 10.  If baking later, cover and set aside until ready to top.
10.  Add your favorite toppings, but not too much!  A little goes a long way, especially with sauce.
11. Bake an additional 8-10 min. until crust is a nice light brown color.

I used a chunky tomato basil sauce, shredded mozzarella, half was pepperoni and half was portobello mushrooms, sweet peppers and arugula.  It was delicious! What are your favorite pizza toppings?  

Monday, June 23, 2014

Ology Laundry Liquid- Pledge to Win!

A few years ago, I gave birth to my first child, a beautiful baby girl named Josephine and our lives changed forever.  She was perfect of course, but she was fair skinned, red haired and had extremely sensitive skin.  Her skin would break out into itchy red dry patches that looked so miserable.  My pediatrician confirmed that she had eczema and recommended that we immediately stop using products that contained fragrances or dyes, so we did and her eczema cleared up significantly.  We have been fragrance free since, so I was very excited to get an opportunity through Mom's Meet to sample and review Ology Laundry Liquid.    
Here is what I love about the 2x Laundry Liquid (besides the cute packaging):
* It's gentle on clothes & skin, while still fighting tough stains 
* It works in both HE & regular machines & is formulated to clean all types of loads (regular, delicates, & wools) 
* It has no dyes, no artificial fragrances, no phosphates & none of these harmful chemicals: ammonia, chlorine bleach, DEA (diethanolamine), TEA (triethanolamine), parabens, phthalates, formaldehyde, nonylphenol ethoxylates, triclosan, and SLS/SLES 
* The bottles are made from post consumer materials & the product is plant & mineral based 
* The products are never tested on animals & do not contain any animal byproducts 
* It is available at Walgreens & retails for only $6.79 (33 loads) 
Overall, I was very pleased and impressed with this brand and its products, from their sustainability to their efficiency.  I would definitely recommend their Laundry Liquid.  It was just as good, if not better than the ALL Free & Clear that I had been using, but much better for the environment and my family.  I also highly recommend their All Purpose Cleaner.  It has a great citrus and lavender scent and is safe to use around my family for practically every cleaning purpose.  Each of the Ology products is designed to make it easy to have a happier, healthier home and world—for both current and future generations. 

Take the Ology Pledge for a Chance to Win 1 of 10 $100 Giftcards!
• Simply write up a pledge to how you will create a healthier home. You can also take a photo or create a short video to share along with your pledge, but is not required.
• Post your pledge on one (or more!) of your favorite social networks: Instagram, Facebook, Twitter, Pinterest, YouTube, or Vine.
Important: All social media posts must include the hashtag #OlogyPledge in order to enter the sweepstakes.
That's it! Good Luck!  Share your pledge with us in the comments below!


*I received this product for free from the sponsor of the Moms MeetSM program, May Media Group LLC, who received it directly from the manufacturer. As a Moms MeetsSM blogger, I agreed to use this product and post my opinion on my blog. My opinions do not necessarily reflect the opinions of May Media Group LLC or the manufacturer of the product. 

Tuesday, June 10, 2014

Easy DIY Scrabble Tile Holder Picture Stands

Repurposing wooden Scrabble tiles has been the rage for quite awhile now.  I've seen them used at weddings, on Christmas ornaments, as coasters, framed in wall crosswords, monogram necklaces, etc.  Every time I see a cheap Scrabble game at a garage sale or thrift store, I have to pick it up because there are so many fun uses for them!  I've even sold my extra tiles & holders on Ebay for a small profit.  Here is a simple name display in my daughters room.  
The stands have long been forgotten and discarded.  Here's a super simple, yet modern way to use them!  For the picture stand project, get some basic wooden Scrabble tile holders.
I love the natural wood look, but my room decor didn't have any other light wood so I painted them.  Use them as is or paint them whatever color your little heart desires, my white took a couple coats.
Once the paint is dry, cut some 3M wall stickies in half (lengthwise) and apply to the flat back of holder.  I know, brain science, right?
Now find some small postcards, pictures or cards to display and figure out where you want to hang them.  I tried a few different options around the house (that's my sons room below), but I  finally settled for the personal photos of family for a spot in my bare hallway.  I had to add a little piece of tape to the back of the photos to keep them from falling off when someone walked by, but I don't think the heavier cards would require that.
Pretty easy, right?  What projects or gifts have you used Scrabble tiles or tile holders for?   

My Goodies, My Goodies, My T.L.C. VoxBox Goodies!

I got some super fun items to sample from Influenster.
Let me take you through my box of goodies.

*First, I received a bar of Ivory Soap.  I love that it is almost 100% pure and has such cute vintage style packaging.  I have already opened it up and started using it, but I want another bar to display in a bathroom basket for guests.
  *Neo To Go (Neosporin Spray)  Perfect to keep on your keychain, in your purse or diaper bag for those scraped knees at the park.  No Touch & No Sting!  I immediately put this in my glovebox with some spare band aides.  Now I am all set for those scraped knees at the park this summer.
*Puffs To Go!  Who doesn't need these?!....especially coming out of a terrible allergy season!  They also have lotion in them, so no more sore nostrils!  Love having these in my purse!
*Avon ANEW Reversalist Complete Renewal Express Wrinkle Smoother- This is a product I was so excited to get a chance to try.  As a stay at home mom of (almost) 3, I feel younger on the inside than I look on the outside, so any help I can get with the wrinkles would be great!  But so far I have not been super impressed with the results.  I'm hoping other people see less wrinkles than I do or that the results will increase over use.  I definitely appreciate the moisture it adds to my dry skin. 
*Shell Fuel Rewards Card- I love saving money, especially on things that I use almost daily.  I don't usually use Shell, just because there is a Seven Eleven right next to our house.  But there is a Shell station 1 exit away so I stopped by on my way to the grocery store to use my card for the first time and totally saved .03 per gallon.  I'm excited to have this card for trips and to start saving more money on gas!  Check it out:  SAVE MONEY HERE! 
*Now time for my favorite item from the VoxBox!  Breyers Gelato Indulgences- YUM!  I received a coupon to try this new product for free.  I picked the Vanilla Caramel and I went and got it as soon as my kids went to sleep (mainly so I didn't have to share).  It is really soft and creamy and yes, I ate it right out of the tub.  It's more fun that way!  I would definitely recommend this for a fun splurge or a date night in with your significant other.  
Thanks Influenster for letting me try out all these goodies!  
Have you tried any of these?  What did you think?